THE MOST EFFICIENT INDUSTRIALIZED CONSTRUCTION SYSTEM ON THE MARKET
Prefabricated pools and pools
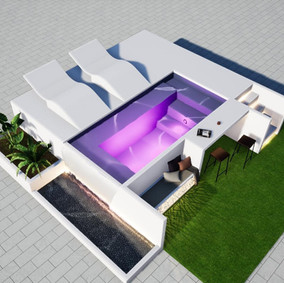
THE MOST EFFICIENT QUICK POOL GLASS
TRANSPORTABLE AND COMPLETELY CUSTOMIZABLE
.png)
.png)

TRANSPORTABLE
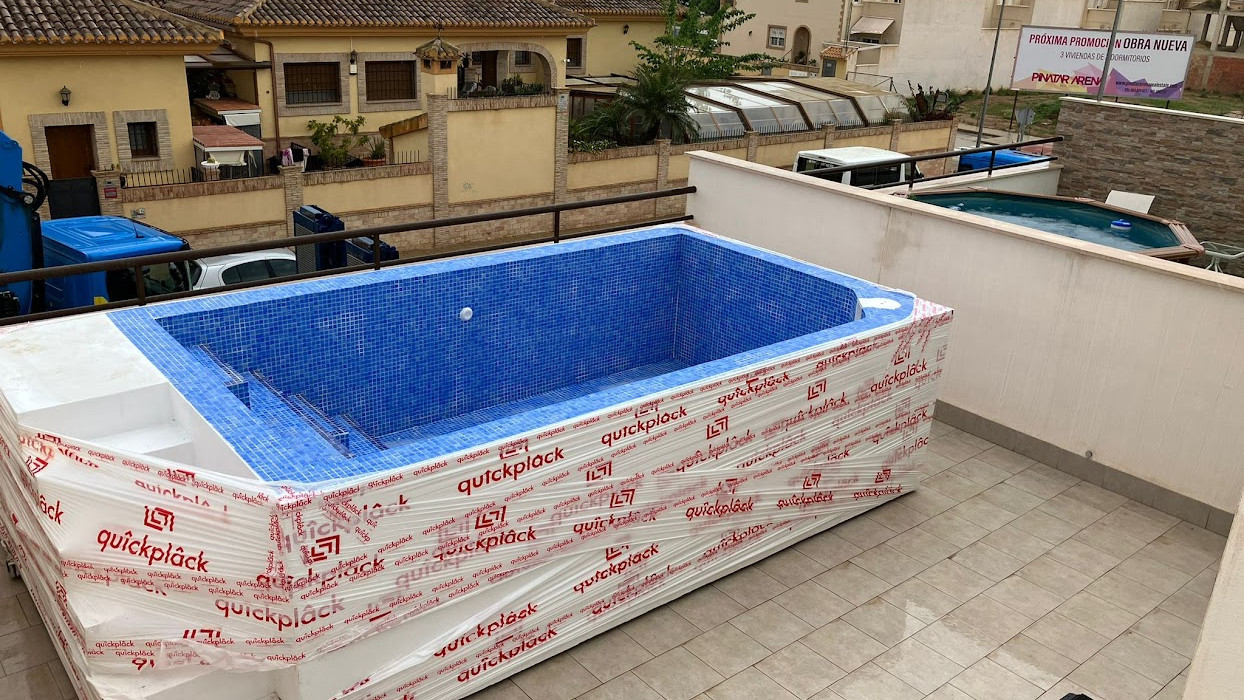
100% transportable wherever you choose, and with the finishes you prefer from a glass to a pool
.png)
CUSTOMIZABLE
Choose from our catalog, or create your personal oasis, the decision is yours
.png)
RESISTANT
Made of high quality materials that guarantee a durability of the glass of up to 50 years
.png)
WITHOUT WORKS AND PERMITS
We ship and assemble your pool in one day, without waiting or hassles for you, as well as without the need for permits.
.png)
SPEED OF EXECUTION AND WATERPROOFING
Our industrialized process allows swimming pools to be manufactured faster than construction ones, in addition to being 100% waterproofed.
.png)
MAINTENANCE FREE AND GUARANTEED
Enjoy a self-efficient pool, with minimal care
quîckpool DESIGN CATALOG


READ IT HERE


OUR PROJECTS

LOWER FRAME


Firstly, we begin with the manufacture of a lower metal frame made up of laminated steel profiles with a square section, which must assume the maximum exterior measurements of the pool design. The design can consider different options, such as being composed only of the water container or also including an exterior platform with stairs, compartments to house installations, etc.
The frame is intended to be the base of all these surfaces. Inside the perimeter metal frame, the remaining metal elements are arranged, parallel and spaced 1.00 m apart, on axes, so that they coincide with the lower part of the joint between floor panels, allowing their fixation and screwing. The design must be adjusted for correct distribution and ensuring the support of all the paneling. Depending on the width of the frame, a central stiffening element will be provided like the one in the figure.

MECHANICAL FIXING OF FLOOR PANELS

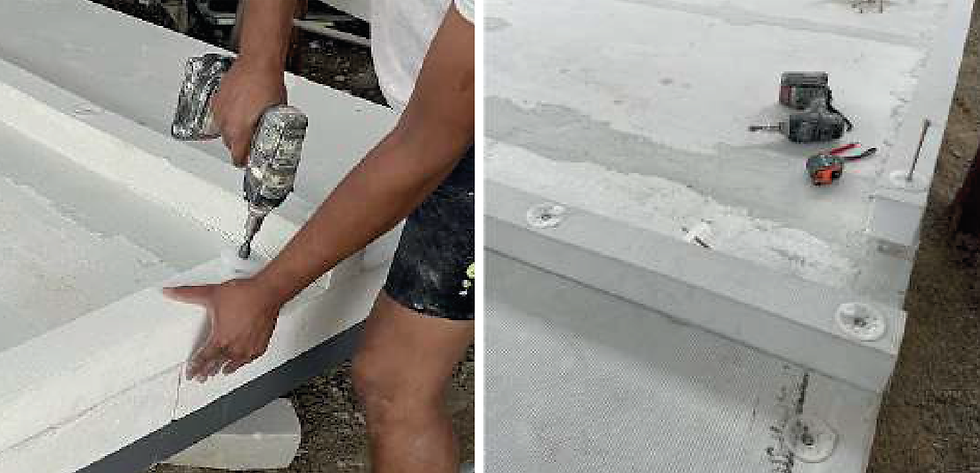
Subsequently, the panels will be mechanically fixed using the corresponding screws according to the panel thickness. Screws will generally be placed every 50cm for correct panel fastening.
COMPRESSION BASE


To consolidate the support of the pool floor on the ground, pieces of EPS are placed in the boxes between the different mental elements. These pieces have the same thickness as the section of profiles used so that the entire assembly is at the same height.
PLACING FLOOR PANELS


JOINT TREATMENT quîck fiber + quîck môrtar


As is usual in the quîckplâck system, the corresponding joint treatment will be carried out, applying quîck fîber and quîck môrtar on the upper face of all the metal elements of the frame for the perfect chemical and mechanical union of the future floor panels of the pool with the frame itself. For the connection with the pressure base (polystyrene interstitial panels) only quîck môrtar will be used.
JOINT TREATMENT quîck môtar + quîck fîber


Again we will carry out the upper joint treatment with our quîckfîber and quîckmôrtar to treat the joints between panels (10 cm strips). Perimeterally, in addition, we will have quîckmôrtar for the next receipt of the reinforcement strips at the base of the walls of the vessel. We will describe such slats below.
REINFORCEMENT PIECE FOR THE BASE OF THE WALL PANELS


To reinforce the future walls that make up the pool basin, strapped EPS slats will be placed (see next step) measuring approximately 50x50cm, chemically and mechanically fixed to the lower frame.
DETAIL OF REINFORCEMENT PIECE


STRAPING AND TREATMENT OF JOINTS WITH quîck môrtar + quîck fîber


After placing the reinforcement piece, the joint treatment and the corresponding strapping are carried out with quîckfîber and quîckmôrtar, covering the entire piece and extending 10 cm beyond the strip as an overlap with the adjacent material, be it a floor panel ( on the inside) or metal frame (on the outside), depending on the case. Additionally, the surface is prepared with adhesive quîckmôrtar to receive the wall panels.
DETAIL 1. TREATMENT OF JOINTS WITH MATCHING FRAME


DETAIL 2. TREATMENT OF JOINTS WITH NON-MATCHING FRAME


Application of quîck môrtar and quîck fîber on all the interior and exterior joining edges of the new panels. The treatment consists of applying quîckmôrtar and superficial quîckfiber on all the interior and exterior joint edges of the new panels, extending 10cm to both sides of the joint to reinforce the union; In addition, interstitial quîckmôrtar is applied between panel ends. For the entire lower part, a continuous joint treatment will be carried out throughout the base so that the metal frame, floor panel, base reinforcement and 10 cm extension of the wall panel are covered.
JOINT AND FITTING SCHEME WALL-LOWER REINFORCEMENT


The wall panels must be prepared by trimming the outer area of the base portion to size to fit the reinforcement piece previously installed on the floor.
BASIC PREINSTALLATION


The spaces must be prepared for the passage of installations, as well as the appropriate openings for water impellers, returns, lights, and others. Their position must be taken into account considering that the maximum water pressure is at the bottom of the glass, so the grooves must be at the top. After opening the grooves, pipes and elbows will be passed and then they will be closed to continue manufacturing the pool.

PLACING WALL PANELS


Next, we proceed to place the walls of the pool. These, depending on the volume of water to be contained, will be of variable thickness, considering 200mm as a minimum. As on previous occasions, the joining of the panels will be carried out with the typical joint treatment ( quîck môrtar + quîck fiber ).
JOINT TREATMENT quîck fiber + quîck mortar


Application of quîck môrtar and quîck fîber on all the interior and exterior joining edges of the new panels. The treatment consists of applying quîckmôrtar and superficial quîckfiber on all the interior and exterior joint edges of the new panels, extending 10cm to both sides of the joint to reinforce the union; In addition, interstitial quîckmôrtar is applied between panel ends. For the entire lower part, a continuous joint treatment will be carried out throughout the base so that the metal frame, floor panel, base reinforcement and 10 cm extension of the wall panel are covered.
AXONOMETRIC SCHEME


BASIC PREINSTALLATION


The spaces must be prepared for the passage of installations, as well as the appropriate openings for water impellers, returns, lights, and others. Their position must be taken into account considering that the maximum water pressure is at the bottom of the glass, so the grooves must be at the top. After opening the grooves, pipes and elbows will be passed and then they will be closed to continue manufacturing the pool.

QUICK MÔTAR AND QUICK FîBER JOINT TREATMENT


This joint treatment must be extremely careful to avoid the buoyancy of the added elements. In addition to the typical joint treatment, a quick môrtar and quick fîber treatment should be applied. on the entire surface of the recently added elements to unify their texture with the rest of the elements of the pool.

INSTALLATION OF INTERIOR TRIANGULAR SLATS


As reinforcement on all interior concave edges (both horizontal and vertical), EPS slats with triangular section straps will be placed for a more balanced distribution of forces in such joints.

QUICK MÔRTAR AND QUICK FîBER JOINT TREATMENT


Joint treatment with quîck môrtar and quîck fîber will be applied to the elements described above, contemplating 10cm of joint surface with the walls of the pool.

EXTERIOR COATING WITH quîck môrtar and quîck fîber


To reinforce the glass and give unity to the whole, the entire surface will be tied with a layer of quick mortar and quick fiber , each mesh band overlapping both horizontally and vertically by 20cm with the previous one.

EXTERIOR COATING WITH quîck môrtar and quîck fîber


To reinforce the glass and give unity to the whole, the entire surface will be tied with a layer of quick mortar and quick fiber , each mesh band overlapping both horizontally and vertically by 20cm with the previous one.

EXTERIOR COATING WITH quîck môrtar and quîck fîber


To reinforce the glass and give unity to the whole, the entire surface will be tied with a layer of quick mortar and quick fiber , each mesh band overlapping both horizontally and vertically by 20cm with the previous one.

VASE WATERPROOFING


Once the entire piece is formed, the waterproofing is applied with two layers of quîck môrtar imper two layers of quîck môrtar imper on the inside of the walls of the vessel, descending 10cm along its exterior face.
VASE WATERPROOFING


Once the entire piece is formed, the waterproofing proceeds to be projected with two layers of quîck môrtar imper two layers of quîckmôrtar imper on the inside of the walls of the glass, descending 10cm on its exterior face.

TIGHTNESS TESTS


After placing the pertinent filtration equipment, sealing tests are carried out on the vessel, thus checking its correct waterproofing as well as the joints and sealing of the tube passages. Afterwards, the final finishing treatment will be given.
PLACEMENT OF FINISHING MATERIALS


.jpg)


